Near-infrared scanning (NIRS)

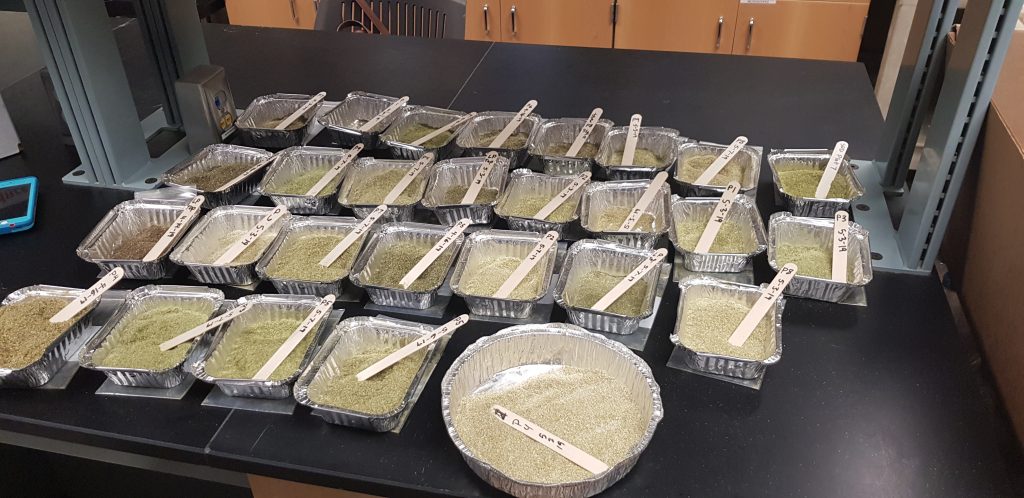
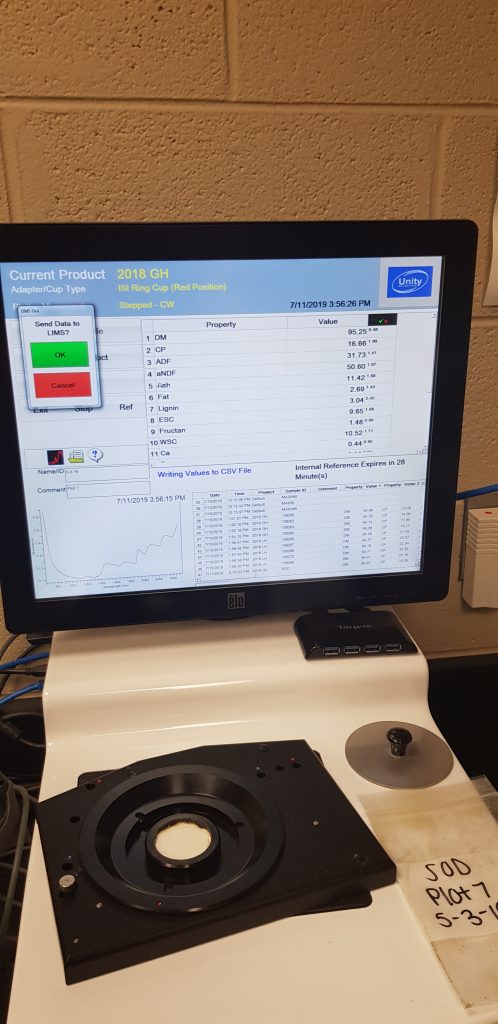
Once grinding is completed, samples are ready for NIRS sampling. The sampling process is carried out in the following steps.
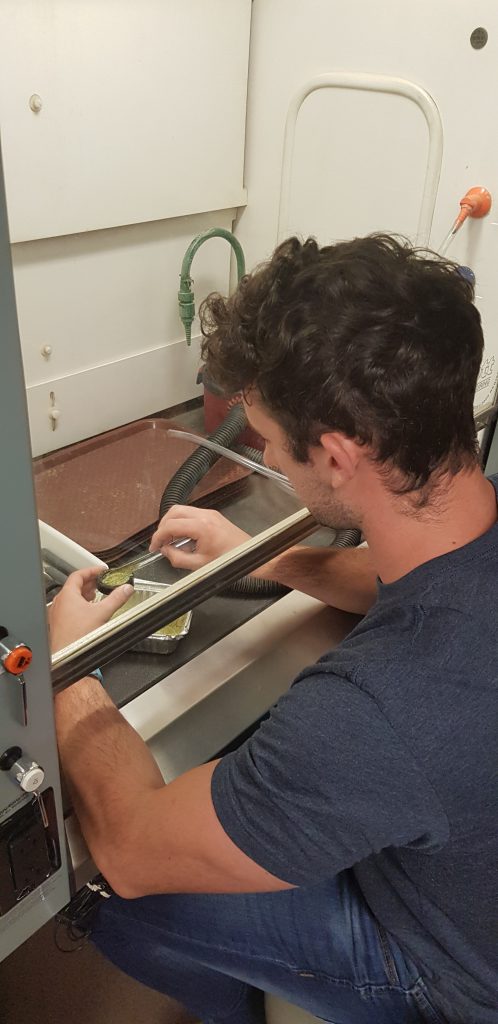
1 – forage sample is placed into the sample plate and sealed in (make sure not to touch the glass)
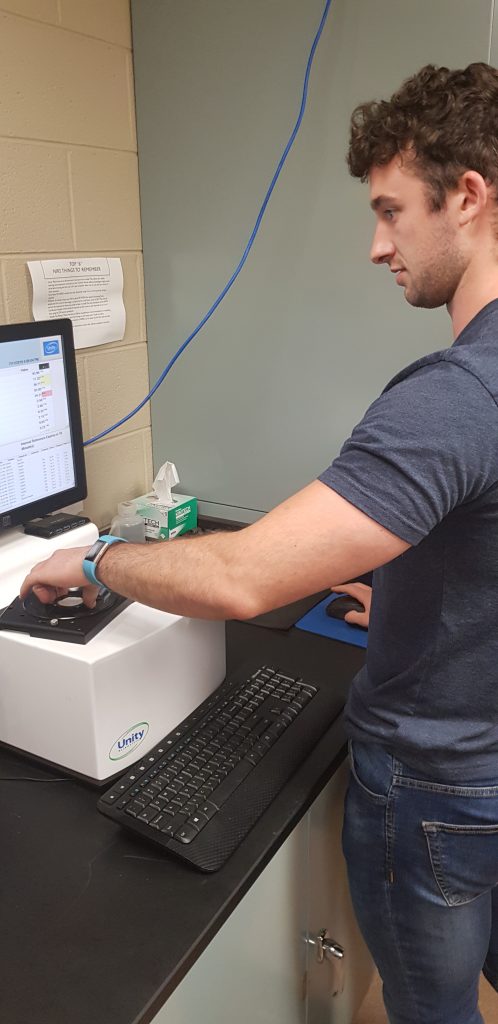
2 – Place sample plate on NIRS equipment
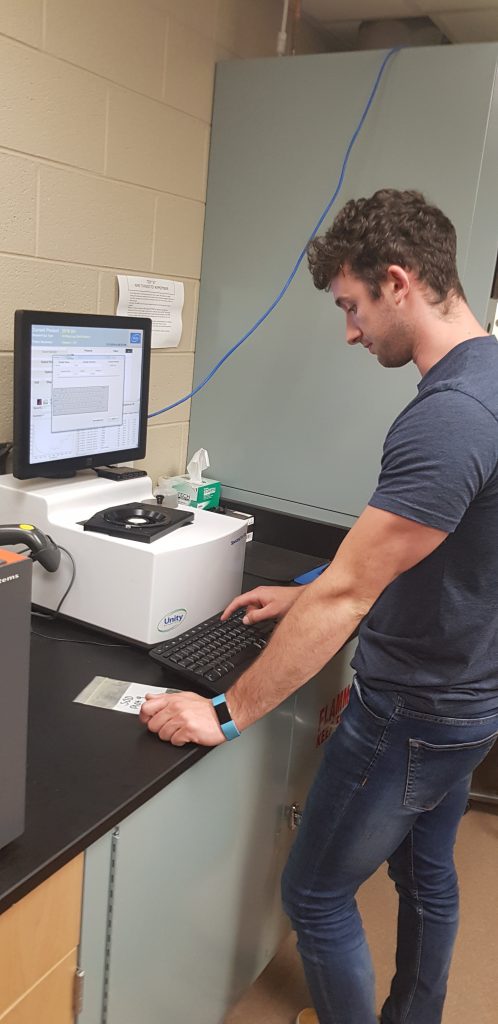
3 – Enter in plot number, date and initials to the system and run test
4 – After 30 seconds a report is generated containing information of mineral content

All forages plated and ready for sampling
Placing forage into sample plate and sealing
Placing sample plate on NIRS equipment
Entering plot number, date and initials to the system
Final report which gives you nutritional and mineral information

Grinding and plating forages

Once forages were sorted it was time to grind the samples into tiny particles. In the laboratory forages were placed into a grinding machine and the placed into individual bags .

Process of grinding forages.
Once grinding was complete, forages were stored in individual bags and labelled

Forage preparation

Today I was in the forage laboratory sorting and preparing forages by the farm ID and grass mixture.
1 – Forage was placed on a a scale and weight was taken
2 – Roughly half of this was then removed and placed into its original bag
3 – The remaining half was then separated in accordance to the plot it was taken from and the mixture sown in the plot.
4 – If the mixture was specifically tall fescue and red clover only them species were collected and placed in individual bags and labelled ‘tall fescue’ and ‘red clover’. Any other forage species within the mixture were placed in one bag and labelled ‘weeds’.
5 – All bags were then placed in incubators at 45 degrees for 48 hours. In the coming days these forages will be grinded and results obtained.

Weighing forage samples
Separating the forages required and not required
Placing required forages in labelled bags
Placing all bags in incubators at 45 degrees for 48 hours

Milk Culturing

  1. Before plating, clean inside the hood (protective incubator) with Bac Down and wipe down. Spray with alcohol and wait to dry.
  2. Place vortex, loop sticks and empty jar in the hood
  3. Milk samples were thawed out and the tubes were placed on a vortex to shake up the contents .
  4. Each plate was split into 4 sections which correlated with each teat.
  5. Moving counter clockwise on the plate and using a separate loop stick for each milk sample, in a swift movement, swipe milk sample onto its identified section.
  6. Plates are placed in incubators for 24 hours. When revisiting plates if there two types of growth (bacteria) it identifies infection.  
Milk tubes are placed on vortex which shake up the contents
Using the a loop stick, dip into milk tube
Smear loop stick onto plate in a swift motion

Blood sampling

Bloods are collected from the tail of each cow on the trial. Once returned to the laboratory, tubes which contain the bloods are weighted evenly and placed into a sorting machine called Centrifuge. Here the blood and serum are separated. From this I can then remove the serum content, place in a new tube the place in the freezer until testing.

Blood samples are weighted evenly before placing in Centrifuge as imbalance may affect the splitting of blood and serum .
Centrifuge
Post Centrifuge – blood at the bottom of tube, serum at the top

Forage Sampling

Each test plot was measured using a rising plate meter and quadrant/clippers. Rising plate meter records grass height while clipping the grass allows me to bring it back to the laboratory where i can complete research and evaluate mineral status

Grazing pasture cows were entering post milking. This mixture is a sudex warm season specie.

DHI Testing

After a cow was milked into buckets, they were weighted to find out total weight. A sample was also taken from each bucket and examined for milk solids such as fat, protein and somatic cell count.

Buckets were collected after milking, weighted and sampled in the DHI kart

Milk Sampling

Sterile clothes were used to clean the top of each teat. Each teat was stripped and then milked into individual tubes labelled and corresponding to each teat (RE = Right Front). Tubes were placed in ice until returned to the laboratory where they were placed in the freezer. Later in the week milk samples will be plated to examine if there is any diseases such as mastitis in individual teats of individual cows.

Milk samples before placing them into the freezer

Catching Flies

Photos were taken from the back and under belly of cows. Flies were then caught from the back and under belly from the cows, as well as fly traps located around the farms. Once caught, flies are placed into secure bags and played in ice until returned to the laboratory freezer. Once in the laboratory, test are carried out to examine if flies contribute to the spread of diseases and what diseases it is.

‘Amish’ ask you a question ??

Wednesday the 26th and Thursday the 27th of July, I made trips to Amish and Mennonite farms in Kentucky. This was a great opportunity as I got to experience the cultures and how each performs with little equipment as we have in Ireland. On these farms duties carried out were
1- Catching flies from backs and under bellies of cows
2- Milk sampling cows
3- DHI testing
4- Forage sampling
5- Blooding cows

Cows were milked using a movable bucket which could hook up to vacuum pipes